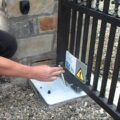
Automatic gate openers provide the security we need while saving us time. Often used on properties such as homes, apartment complexes, and places of employment, they are easy to install and do not require much voltage to operate.
Table of Contents
Installing Automatic Gate Opener Procedures in 2025
Installing an automatic gate opener is a simple project that usually takes two to three hours. Here are two efficient ways to install a gate opener(the first on video, the second one for those who want it written):
1. Prepare the Gate for Installation
There are requirements that every gate must meet for a successful installation:
- Wheels cannot be attached to the gate.
- The gate must be aligned with the opener and able to freely swing on its hinges.
- If there is any damaged or worn hardware, it needs to be replaced or repaired beforehand.
2. Decide Where to position the gate
Position the gate opener near the centerline of the gate. Thus keeping the gate from twisting and flexing a lot when the opener is activated.
3. Install the Gate’s Post Bracket Assembly
The post bracket assembly will set clearance between the gate and the gate opener. Set up your post bracket assembly, then connect it to the rear mount of the gate opener.
Connect your gate bracket to the front mount of the gate opener, the gate in the open position, and the opener arm completed retracted, then adjust the gate bracket and the post bracket assembly until the opener is entirely leveled.
Finally, hold the opener level, and use C-clamps to temporarily keep the gate bracket and the post bracket assembly in their positions on the gate and gate post.
4. Mount the Opener Arm
To mount the opener arm, connect the opener arm to the gate’s post bracket assembly and the gate bracket. Ensure that the opener arm is entirely leveled, adjusting your post bracket assembly as needed.
5. Install a Closed Position Stop Plate
The Closed Position Stop Plate will stabilize the gate while it is in the closed position.
Disengage the opener from the gate, and put the gate in the closed position. Secondly, horizontally join the stop plate to the end of the gate frame. Move the closed position stop plate towards the gate post until the two are touching. Then, completely tighten the stop plate’s hardware.
Finally, move the gate to the open position, and re-attach the opener arm to the gate bracket.
Optional: Mount the Control Box
Once you’ve completed this step, check to see if your gate opener model comes with a control box. If so, mount it. The control box is usually mounted a minimum of 3 feet above the ground and at least 3 feet from any power source.
6. Connect Electronics
This step requires handling battery wires, the power cable, the transformer, and the batteries.
- To connect the battery wires, run them through the control box strain relief slot then attach the red and black wires to their corresponding terminals.
- To connect the power cable, insert it through the strain relief slots. Connect the power cable wires to their correct terminal blocks, which will be marked by color.
- They connect either a solar panel or a transformer to the control board so the battery will maintain its power.
- Connect the battery by attaching its wires to the battery’s terminals. Attach red to positive and black to negative.
7. Apply Some Finishing Touches
The last steps are setting up some controls. Most of these have to do with the control board.
You will want to set your gate’s closed position limit, adjust its stall force setting and set the auto-close timing. Which will determine how long the gate remains open before it closes. However, this setting is optional, if desired, you can disable this setting.
You will also want to personalize your transmitter’s settings. Follow the steps in the instruction manual to learn how to do this. Lastly, your gate opener kit includes(or should include) warning signs. Install these on each side of the gate.
Final Thoughts
When you decide to install an automatic gate opener, leave the welders and electricians behind and take on this project yourself. Doesn’t matter it is a manual gate or an electric gate. Follow these easy steps to get your automatic gate opener up and running. Taking a few hours out of your day could provide your home or your business with the security that you need.
Do installing automatic gate opener yourself, and have some fun!


