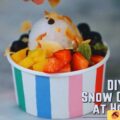
Snow cones are a timeless treat and easy to make. One of the world’s favorite desserts, snow cone syrup recipes have been around for years and have earned a place in the hearts of people everywhere, whether summer or winter.
But, wouldn’t it be great if you didn’t have to wait for the fair to be in town or to watch your favorite sports team play just to enjoy a snow cone? As it turns out, you don’t have to wait for homemade snow cone syrup; snow cones are easy to make in your home using few things, minimal prep time, and a list of the best snow cone syrup recipes.
Table of Contents
About Snow Cones
Sometimes called snowballs, the first snow cone is believed to have been created in the 1850s when enormous blocks of frozen water froze and were sold. Ice wagons would carry blocks of ice from factories to businesses. Children who saw these ice wagons pass by would approach the wagons and ask for ice shavings.
After a while, parents decided that the ice shavings could be something of a dessert for their kids with the right recipes; they began making flavored syrups at home and drizzled these syrups over their kids’ ice. One of the first flavors to ever be made was egg custard, a mixture of eggs, vanilla, and sugar. One of the simple recipes it was a very popular flavoring. Later, more flavors, such as banana, grape, and cherry, would be created.
Now there are over 100 flavors of syrup for snow cones, making the snow cone a very versatile and sought-after dessert. Although the flavorings can be purchased in stores, parents can know what they are putting into their children’s bodies by using a few inexpensive things to make snow cones at home with the right snow cone syrup recipes.
Top 10 Homemade Snow Cone Syrup Recipes
These are 10 of the best snow cone recipes that will satisfy everyone with minimal prep time.
1. Mountain Dew Snow Cones
Ingredients
- 1 cup of Mountain Dew Soda
- 1 cup of sugar
- 3 cups of ice
Directions
- In a medium saucepan, combine sugar and soda.
- Heat and stir until mixture until boiling.
- Allow mixture to boil for 2-3 minutes.
- Remove mixture from heat and let the syrup cool until it is room temperature.
- Pour mixture into a container and chill it in the refrigerator for 30 minutes to an hour.
Pour chilled syrup over the ice, and enjoy eating soda!
Tip:
To bring out the soda’s colors, use one drop of yellow and green food coloring after step 3.
2. Passion Fruit Snow Cones
A snow cone made from real fruit. This the best fruit snow cones recipe.
Ingredients
- 1 cup of water
- Four tablespoons fresh or frozen passion fruit pulp
- 1 cup of sugar
Directions
- Combine sugar and water in a saucepan, and set the heat to high.
- After the mixture boils, reduce the heat to low.
- Simmer the mixture until the sugar has completely dissolved.
- Add the pulp and simmer for 4 minutes.
- Remove from heat and cool down.
Pour liquid into a container, then pour on top of shaved ice. Enjoy!
Tip:
If you chose pulp that has seeds, strain the liquid into the container. Note that syrup can remain refrigerated for up to 2 weeks.
3. Blue Bunny Bubble Gum Snow Cone
Ingredients
- 2 cups sugar
- food coloring (optional)
- 1 tsp bubble gum extract
- 1 cup water
Directions
- With your stove’s heat on high, combine sugar, extract, and water in a large pot.
- Stir the mixture 2 or 3 times to ensure that everything is evenly distributed.
- Bring the mixture to a boil. Once the mixture boils, add food coloring, if desired.
- Continue allowing the mixture to boil until the mixture is very bubbly. Once the mixture is bubbly, cook for one more minute.
- Turn off the heat and allow the mixture to cool completely before pouring it into a container.
Pour the mixture over shaved ice, and enjoy eating bubble gum!
4. Pineapple Snow Cone Syrup Recipe
Who says you have to go to a tropical island just to have a tropical treat? The pineapple syrup recipe is only for you! Make it and enjoy.
Ingredients
- 1 cup of fresh or frozen pineapples
- 2-3 tbs sugar
Directions
- Combine the sugar and pineapples in a medium saucepan.
- Simmer until the sugar has dissolved and the fruit has softened. This generally takes between 3 to 4 minutes.
- Pour the fruit mixture into a food processor and blend until it becomes a smooth puree.
- Strain mixture to receive any bits of seeds.
- Pour into a container and pour over shaved ice. Refrigerate any remaining syrup.
Tip: If you find that the syrup is too thick for your liking, thin it out by using a bit of water or juice.
5. Kool-Aid Snow Cones
Ingredients
- 1 cup of water
- 2 cups of sugar
- 1 pack of Kool-Aid or any brand of unsweetened drink mix
Directions
- Stir together water and sugar in a medium-sized saucepan.
- Bring the components to a boil, and allow them to boil for 1 minute.
- Remove your saucepan from the heating element, and pour in the Kool-Aid(or drink mix). Stir.
- Allow the mixture to cool and thicken before transferring it to a container.
Once mixture has cooled, pour it on top of shaved ice and enjoy a frozen Kool-Aid snow cone!
6. Watermelon Snow Cones
A healthy watermelon dessert with no added sugar!
Ingredients
- 3-4 cups of chilled watermelon sliced into chunks
Directions
- Blend watermelon chunks.
- Strain watermelon liquid into a container.
Pour liquid over shaved ice, and enjoy a low-calorie, tasty dessert!
7. Sugar-Free Snow Cones
These snow cones are perfect for people with diabetes and for those who are watching their caloric intake. Namely, one of the healthier options to sell or have in your fridge to share with others and easy to make.
Ingredients
- 2 cups of water
- 8 to 10 drops of Lorann Flavor oils
- 1 cup of your favorite zero-calorie or low-calorie sweetener
- One teaspoon Xantham Gum
Directions
- Blend one teaspoon of Xantham Gum and 1/4 cup of water on your blender’s highest speed setting until everything is thoroughly combined.
- Add 1 3/4 cups water, the Lorann Flavor oils, and the sweetener to the blender.
- Blend on high until you form a white foam-like mixture. This should only take a few minutes.
- Add more flavor oils if the mixture isn’t flavored to your liking. Keep refrigerated.
This recipe is ideal for eight servings.
Tip:
If you want to color in this syrup, simply add a few drops of food coloring.
8. Rainbow Snow Cones
Ingredients
- 3 or more fruit of your choosing chopped into chunks
- 2-3 tbs of sugar per fruit
Directions
- Combine the sugar and one fruit in a medium saucepan.
- Simmer until the sugar has dissolved and the fruit has softened. This generally takes between 3 and 4 minutes.
- Pour the fruit mixture into a food processor and blend until it becomes a smooth puree.
- Strain mixture to receive any bits of seeds.
- Pour into a container. Refrigerate any remaining syrup.
- Repeat these steps for each type of fruit.
- Scoop shaved ice into a paper snow cone cup.
- To make your snow cones resemble a rainbow, pour each flavor syrup into a line over your ice.
9. Pickle Snow Cones
Ingredients
- Dill pickles
- Fruit juice pouches (Freeze before making snow cones. Each bag makes one snow cone.)
- Gummy bears
- Sour patch kids candy
- Sour Twizzlers candy chopped into 1-inch thick pieces.
- Pop rocks candy
Directions
- Mix gummy bears, sour Twizzlers, and sour patch kids in a bowl.
- Chop dill pickles into tiny chunks.
- Cut one frozen fruit juice pouch along the top, and pour frozen contents into a cup.
- Using a spoon or fork, mash frozen fruit juice until it is the texture of shaved ice and is no longer in one big, frozen block.
- Add candy mixture.
- Add pop rocks.
Mix everything, and enjoy the sour/sweet sensation!
Tip: You can also mash the frozen fruit juice by gently pounding the pouch with your fist before cutting it open and pouring it into a cup.
10. Strawberry Snow Cones
Ingredients
- 2 cups of sugar
- 1 cup of water
- strawberry extract
- red food coloring (optional)
Directions
- With your stove on high, combine sugar and water in a medium saucepan.
- Once the sugar has dissolved, add 1 tsp of extract and one tbs of food coloring.
- Once the mixture has reached a full boil, continue boiling for 1 minute.
- Turn the heat off and allow the mixture to cool before pouring it into a container.
Pour your strawberry syrup over shaved ice, and taste the delicious sweetness of strawberries!
Conclusion
Snow cones will never go out of style. There will always be demand for homemade snow cone syrup recipes because of their versatile flavors and simple recipes.
We hope you will taste and love these easy homemade snow cone recipes. If you have any further questions, please do not hesitate to Contact Us, we would love to hear from you, so leave a reply.
Related Buyer’s Guides and Tools Lists:


